Creating Mandates
Input
- Open the Mandates tab from the Creation menu to display the entry form.
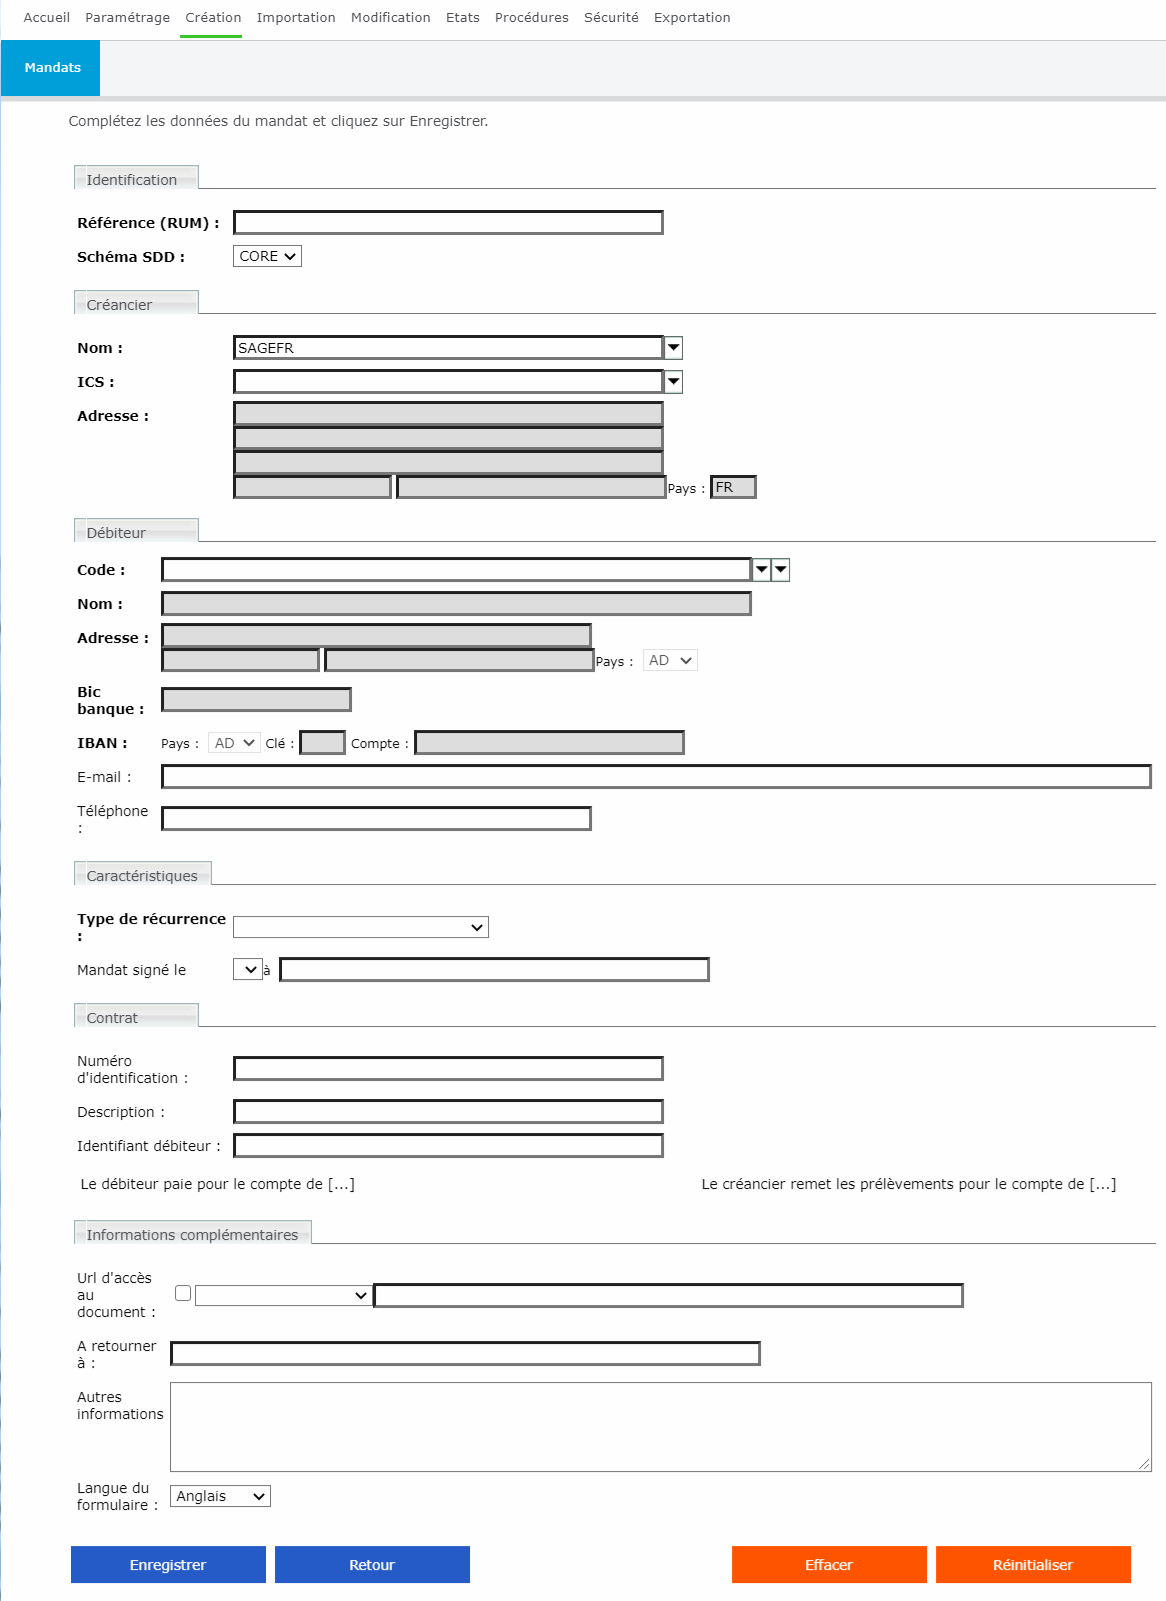
- Complete the sections.
Mandate Identification
- Reference (UMR): Unique Mandate Reference
- Schema: SDD or CORE
Creditor
- Name: select the entity from Contract Manager.
- ICS: default ICS for the entity
- Address: the entity's details are automatically completed.
Debtor
- Code: select the debtor from the third-party list and their Name, Address, Bank BIC and IBAN are automatically specified.
Characteristics
- Recurrence Type: select One-off Direct Debit or Recurrent Direct Debit.
- Mandate signed on [...]at [...] : select the date and place of signature.
Contract
- Complete the fields to identify the contract and if needed creditors and debtors.
Additional Information
- Document URL: select the external file to add to the mandate.
- Other Information: you can enter a free text.
- Form Language: select the language for the PDF file to generate.
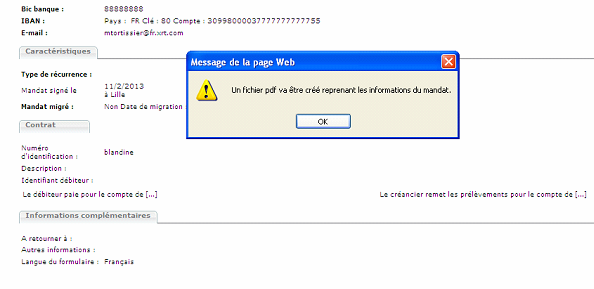
- Click Save to launch the control over the mandate data (mandatory elements and execution date check):
- When some info are missing or incorrect, the mandate status turns to Incomplete. The process can go only when they are completed properly.
- When all the info. in the form are complete and correct, a confirmation page is displayed recapping the entered data. Click Confirm to create the mandate or Cancel if you want to modification some elements.
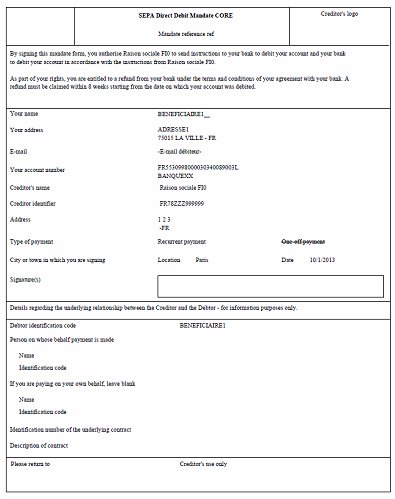
Generating PDF Files
When the mandate saving is confirmed, a message specifies that a "Mandate image PDF" file is created in the selected language.
The PDF file name is automatically generated complying with the following formula: Mandate_RUM_ICS.pdf.
Info
The PDF file can be generated from an Incomplete mandate.